I absolutely *love* making compost.
I realise this is a niche sport / not for everyone, but well, each to our own. For me, composting unashamedly, happily and joyfully makes my heart absolutely sing.
I love the idea of making something precious and wonderful out of waste from the garden and kitchen, and it never fails to amaze me what lovely, crumbly, sweet, fertile stuff comes out of the other end of the process.
So, this post is about how I manage compost in my small London garden. I’m writing it partly as an ode to something I love, and partly to share what I do and what I’ve learned in case it might be useful to someone else.
I have 3 different kinds of composter in the garden and I use them to make lovely, crumbly, fertile stuff that’s absolutely teeming with life and brilliant for soil and plants. There really is no comparison between this and the stuff you buy in bags – for just a bit of effort, even in a small space you can have loads of nourishing, plastic-free, free-of-charge compost that your plants and soil will adore. What’s not to love?
Hot composting
The hot composter is where I put all the kitchen and garden waste for a rapid bit of initial decomposition through the fascinating work of bacteria. They need the right combination of waste material, water and air to work effectively, and when you get that right, they are an absolute marvel.
The sides of the hot bin are made of special insulating material that keeps it really cosy inside, even in the winter. If you get the mixture right and look after it a bit by stirring the top layer each time you put some more waste in, the hot composter can work up a temperature of up to 70C (40-50C is normal and easy to achieve, in my experience) and process your waste in just 4-6 weeks.
These are very pricey things, and I never would have bought one had it not been recommended to me by someone I trust. I’m so glad I did. You can add any kitchen or garden waste – we add all our leftovers, including cooked food, which means we have no kitchen waste at all needing to be collected and taken away. Because the bin works so fast, you can compost a huge amount of waste – everything our kitchen and garden produces – in a very small space, which is really important in my tiny garden where space is very much at a premium. And because it gets so hot, it’s also good at killing off weeds, pests and pathogens (much more so than a cold heap).
Like all composting, you need a good amount of ‘brown’ waste – cardboard, straw or woodchip – alongside your more nitrogen-rich ‘green’ waste which includes kitchen waste and anything green or wet from the garden. You need roughly equal amounts of brown and green material (some say you need a bit more of one or the other, so this is a rough estimate rather than a hard and fast rule – I tend to follow Charles Dowding on these things and he reckons 50:50 is good for any compost heap).
You also need to add material that can hold air pockets, such as composted woodchip or biochar chunks – this is important to supply enough oxygen to the bacteria that will decompose the waste and turn it into lovely compost.
Most of my kitchen and garden waste is green, so I need to add extra brown and oxygenating material in the form of of cardboard packaging, composted bark or woodchips, whenever I add more green material to the bin.
I’ve not been adding enough brown material recently and as a result it had got too wet, cooled down, gone a bit stinky and slimy in places (which is a sign it’s become anaerobic because it’s too wet and heavy, squashing out all the air) and become a breeding ground for tiny black flies which erupted in a horrible cloud whenever we opened the bin. Not ideal. Time to take a deep breath, don a face mask and sort it out.
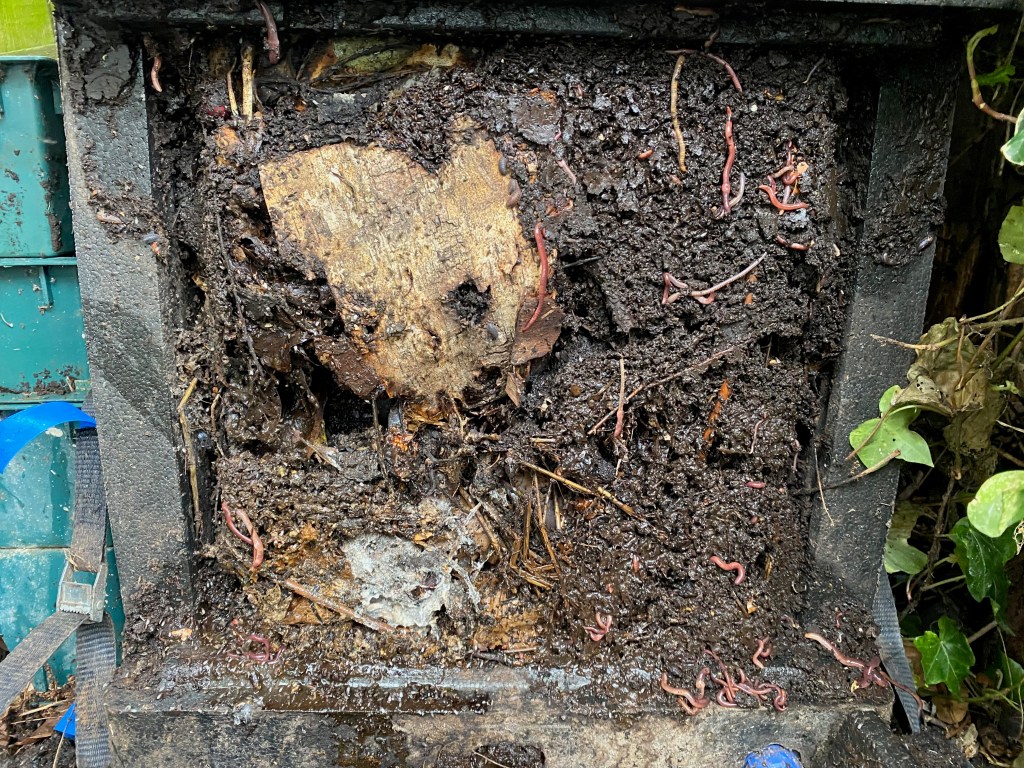
You can see in the picture above that there’s some good brown stuff in there, but it’s inconsistent with some lumps not rotted at all and lots of worms as the temperature had cooled down and they’d found their way in from the nearby cool heap. (Worms are a good thing in any heap, but the hot bin should really be too hot for them if it’s doing its job properly.)
Ideally, as with all composting, I’d chop up all waste before adding it to the bin to make it easier to mix it all up and for the bacteria to process it. I’m not very consistent in doing this so I tend to get lumpy results, with some parts very thoroughly rotted down and others still quite lumpy and recognisable in their original form. That means it normally needs a mix-up part way through the process to even things out a bit and get rid of lumps.
So, I don’t generally use compost straight from the hot bin. Instead I take it out, give it a good mix up, adjust the carbon:nitrogen mix as needed (usually to add more carbon / brown material) and transfer it into one of my other bins to let the composting worms finish off the process at a cooler temperature.
Cool compost bin
Today I emptied most of the hot bin into the cool compost bin, mixing in brown material as I went to correct the carbon:nitrogen ratio. For extra brown material, I used ripped up cardboard packaging and some straw I had in the shed left over from last year. I also added biochar chunks for air pockets and to hold moisture and nutrients in the finished compost.
I added the material in layers, which I find isn’t generally necessary in a compost bin but I find works well if (as in this case) the compost is too wet – the brown layers provide air pockets and soak up some of the moisture to help the heap get to a more friable, aerated consistency that’s ideal for the worms. Layers also help you get a good sense of the ratio of ingredients, which is more difficult if you’re mixing it all together.
In my small garden I manage cool composting in a dalek-shaped plastic bin. Unlike the larger, open wooden bins I have at the allotment, the dalek doesn’t take up much space so can fit easily tucked out of sight behind my shed. I could probably manage just with a couple of these daleks, but they can take a long time to get going (they’re not really big enough to work up much heat), you can’t add cooked food, and they won’t reliably kill pests, weeds or pathogens. I find starting the process off in the hot bin for a few weeks cuts out a huge amount of time and effort, and makes the dalek much more productive and useful.
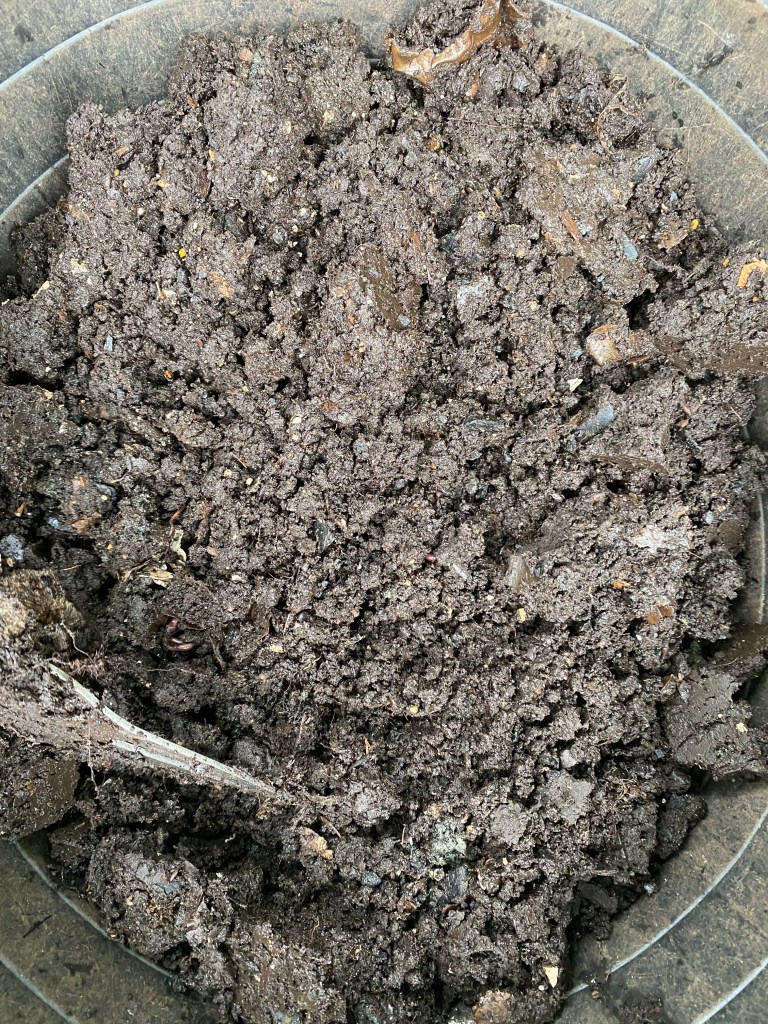
Most of the material from the hot bin today was already quite well rotted, even though it’s only been about 6 weeks since I last emptied it. Now it’s had a bit of a mix up and some air, brown material and biochar chunks, it should be ready within just a few weeks to use as a mulch in the garden or as part of a potting mix for this year’s tomatoes, peppers and cucumbers.
Wormery
My 3rd bin is a wormery – a multi-layered plastic bin with holes in the bottom of each layer to allow worms to travel between them. There’s a sump area at the bottom to collect liquid, and a tap where you can extract ‘worm juice’ to dilute and use as liquid feed for your plants.
Wormeries are ideal for small households and gardens, where space is tight and you might not produce enough waste to feed a larger bin. They process much smaller quantities of waste, very thoroughly, using loads of composting worms.
You can get the bin going by ordering worms (and worm food, which I’ve found isn’t necessary other than when you’re starting out for the first time) online, or you just can wait for them to find the bin or add a few from an existing compost heap. They’ll soon turn up and multiply if they’re happy, which they will be if you add the right mix of brown and green waste, don’t let it get too wet or dry, and keep feeding it new material regularly.
The idea is that the worms start in the bottom layer of ‘bedding’ (you can use coir for this, or some compost that’s already ‘cooked’), and work their way up. As each layer is ready, you can empty it out and then add it back to the top of the pile. I’ve found you can, instead, fill the whole thing up, wait for it to work, and then empty all but the lowest level (which is kept for bedding for the worms to live in) and then start again. I find it easier this way to get the right mix of ingredients than when I’m adding stuff a bit at a time.
The one thing I’ve found worms just won’t deal with is citrus peel – that has to stay in the hot composter for the bacteria to deal with instead. It sometimes requires more than one round of heated composting, too, but it does get there eventually, especially if you chop it into small pieces first.
Like the other methods, worms need the right 50:50 carbon:nitrogen ratio, otherwise you can get problems with nasty smells and flies (if the heap is too wet) or lack of worm action or multiplication (if it’s too dry).
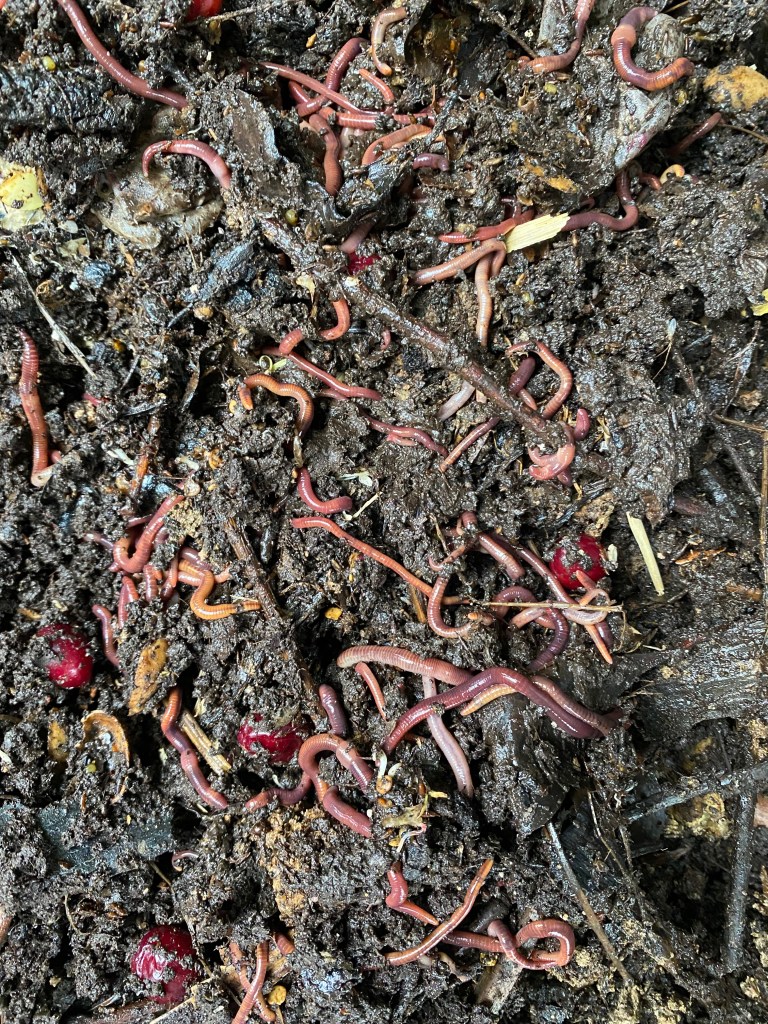
The last time I emptied out the wormery was autumn, when I re-filled it with half-rotted contents from the hot bin. To make space for a new batch of hot bin compost, I emptied out the wormery first. This is the best bit of composting – I’m always amazed at what comes out, knowing how the contents started out.
I was delighted today to find the worms had survived the winter (sometimes in a very cold winter they can die right back if the bin isn’t full; I tend to leave the wormery alone in the coldest weather so as not to let the cold in) and made some absolutely lovely, crumbly, consistent black gold in the process.
I spread the lovely worm compost as a thick mulch around some of my favourite plants in the garden, for a nutrient and biology boost to the soil.
Bokashi next?
One thing I’ve not yet tried is bokashi composting – I’d like to give that a go, but I’m slightly put off by the need for special ingredients to add to the heap. I’d rather not have to order in ingredients, when I can instead just chuck my waste in one of my outdoor bins and rely on the bacteria and worms to do their thing naturally.
A few things I’ve learned
Here are my top tips for composting, based on years of nerding out on the subject:
- when it’s ready: you can tell compost is ready when it smells sweet, looks brown and crumbly, and the constituent parts are no longer recognisable
- if it’s too wet: it will smell bitter and look a bit slimy and unpleasant – in that case, give it a mix up and add more brown material
- if it’s too dry: it won’t rot down and you won’t see much worm action – add more green material to speed things up a bit
- brown ingredients: you always need more brown material than you think you will – save up brown cardboard packaging from deliveries, shredded paper or newspapers, but make sure you rip or crumple them up, and mix them in well or they will form a solid mat within the heap
- chop stuff up: it will work much better if you chop up all the ingredients as you add them – otherwise the results will be inconsistent and it will need a mix-up and a further period of composting before it’s ready
- mix it up: giving compost a good mix-up, even if just once during the process, really helps (even if you’ve chopped the bits up beforehand – it spreads the air, moisture and heat a bit more evenly and I get much more even, consistent results when I do this
- starch-based bags won’t decompose as quickly as other material, regardless of what the label says, even in my hot bin; they need several rounds of hot-bin composting so have to be fished out and put back in for another go each time I empty it
- flies: if your bin or heap starts getting infested with flies – give it a good mix-up, make sure it’s not too wet (and if so add some brown material to correct the balance), and then cover the top with a layer of soil – that should sort it out
- citrus peel and egg shells are quite resistant to composting – they need chopping up very small, and then tend to do better in the hot bin than the wormery or cool bin
- worms: composting worms are not earthworms, so there’s no point adding worms to your heap from your garden soil – you need the composting variety that can’t survive in soil but thrive in compost heaps
- escaping worms: composting worms can be quite adventurous, so don’t worry if you catch some escaping your bin
- biochar: I reckon adding chunks of biochar helps, as the biochar chunks hold air and moisture
- give it a go: above all, don’t be intimidated or put off by complicated tips and rules – it’s not that complicated, the best thing to do is give it a go, see how it goes and adjust as you go
So. That’s my love of composting, there in black and white. I hope someone somewhere might find it useful 🙂

thanks for this at first I did not research this all that much and just added scraps like bits of chopped peppers or cabbage and occasional tea bags into it and let it sit there. My dad helped me with it and he would mulch it to pick up soil from the ground cause otherwise its just a pile of random bits of food. but I think that would kill the worms so, I might ask him to not do that. overall, thanks. also how do i maintain layers without them getting all mixed up?
LikeLike
Hi there 🙂 You don’t need to worry about the layers getting mixed up, you want them to get mixed up eventually,l. It’s just a good way to get it all started if you’re trying to dry the wetter layers out a bit. Good luck!
LikeLiked by 1 person
Ok, thanks. Im making compost for my gardening that im doing outside because im not able to buy any and also its for saving marine life. I made a blog post on gardening and im trying to do that myself and save money by making the compost myself instead of buying it.
LikeLike
Hey, question. I have had my compost for a month i think and there are no worms in it, it’s not too dry or too wet. Is this because its winter where i live? I’ve tried harvesting worms but I can’t find any, they always come out on the sidewalk in summer and once in fall I dug up an earthworm. I can’t buy any worms right now so i’m just finding snails and isopods for my compost for now (I find them a lot in my garden rows) anyway, if the snails are out shouldn’t the worms be out? can you help? How do i find worms in winter and how do I get them to come to my compost? one more question, should i salt my garden to get rid of snails or should i not to put them in my compost? I have potatoes, celery, garlic, and green onions planted right now, so if i should would the salt hurt my plants? Thanks (Sorry that was super long XD)
LikeLike
Hi – worms don’t always appear immediately, they usually find their way in once some initial decomposition (by bacteria) has happened. You don’t need to find worms, they’ll find their way once the conditions are right.
I wouldn’t recommend salt as that could damage your soil and plants – try a beer trap or other method maybe?
LikeLike
ok thanks!
LikeLike
Well, i was concerned because its been a month and more now and when i read online it said it should only take a couple of weeks. my compost is basicly soil but there are lots of small and a couple large chunks in it still but the whole time there is no worms and snails only appear once every 2 weeks idk why.
LikeLike
Oh, I did find a single small small worm a week ago that’s the only time I’ve seen one in there.
I’ve tried stepping on the ground, soapy water, digging, vibrations and other ones i think. the only one that actually was working was the vibrations one, but all i got was a grub worm and tons of isopods, I also found a couple snails. I did this in a moist area that had been covered in leaves so idk if i just dont have any in winter and a ton in summer (I find like 20 new burnt ones on the sidewalk each day in summer)
Hope that helps you give a good answer.
LikeLike